

Changing a front door lock isn’t complicated, but getting it wrong can leave your home vulnerable or your door inoperable. We’ll walk you through every stage, from identifying your lock type to fitting the replacement correctly. Before you pick up a screwdriver, though, there are a few things you need to check first.
Key Takeaways
- Identify your lock type first: timber doors typically use a five-lever mortice deadlock, while UPVC and composite doors use a multi-point cylinder lock.
- Check your home insurance policy for BS3621 compliance requirements before replacing locks, as non-compliance can invalidate claims.
- For euro cylinders, measure from the central fixing screw to each end separately, recording both measurements accurately.
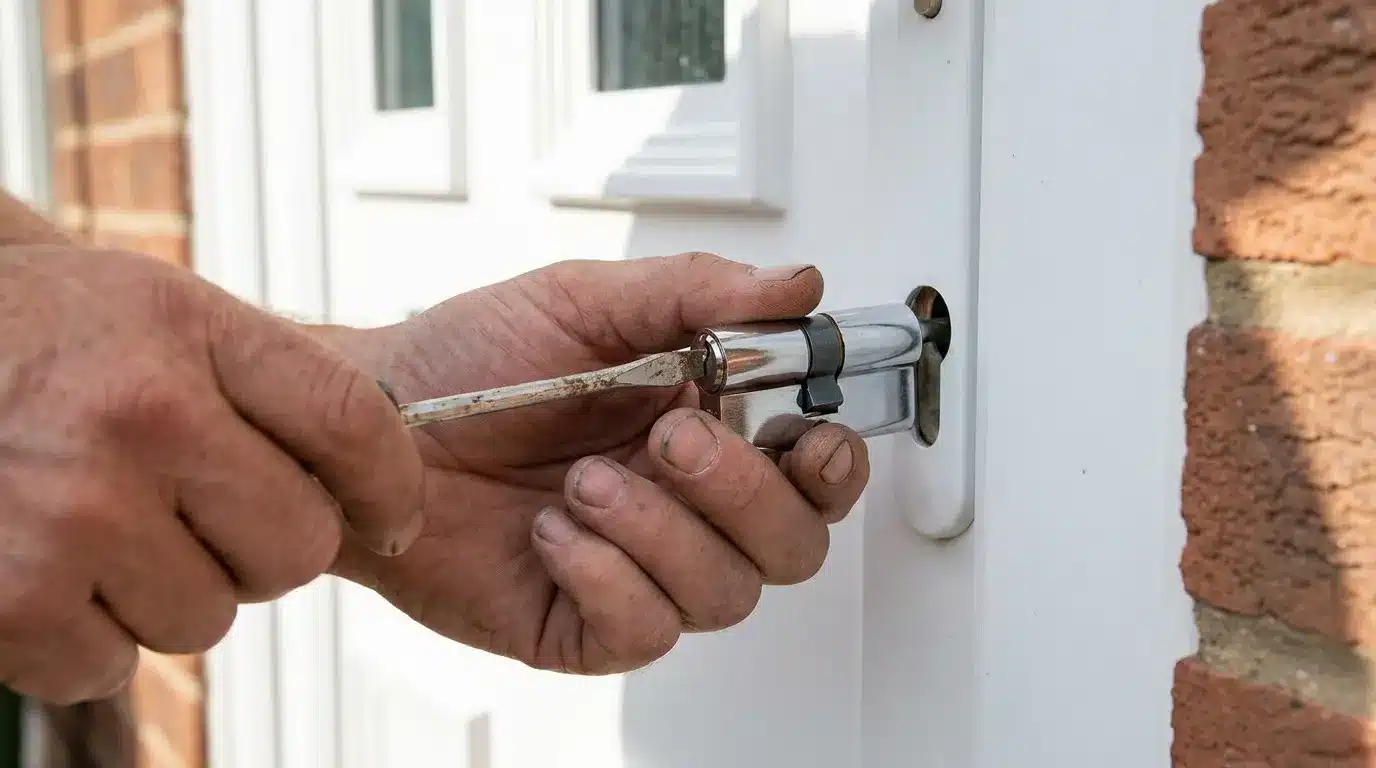
- To remove a euro cylinder, release the fixing screw and turn the key 10-15 degrees to retract the cam before sliding it out.
- Diagnose the actual fault before replacing parts, as stiff keys, handle issues, or door gaps may indicate alignment rather than lock failure.
Euro Cylinder, Mortice, or Multi-Point: What Lock Does Your Door Have?
Before you can change a front door lock, you need to know what type of lock your door already has, because the process differs markedly depending on the answer.
Timber doors typically use a five-lever mortice deadlock, fitted into a cavity cut into the door edge.
UPVC and composite doors almost always use a multi-point locking mechanism operated by a euro cylinder.
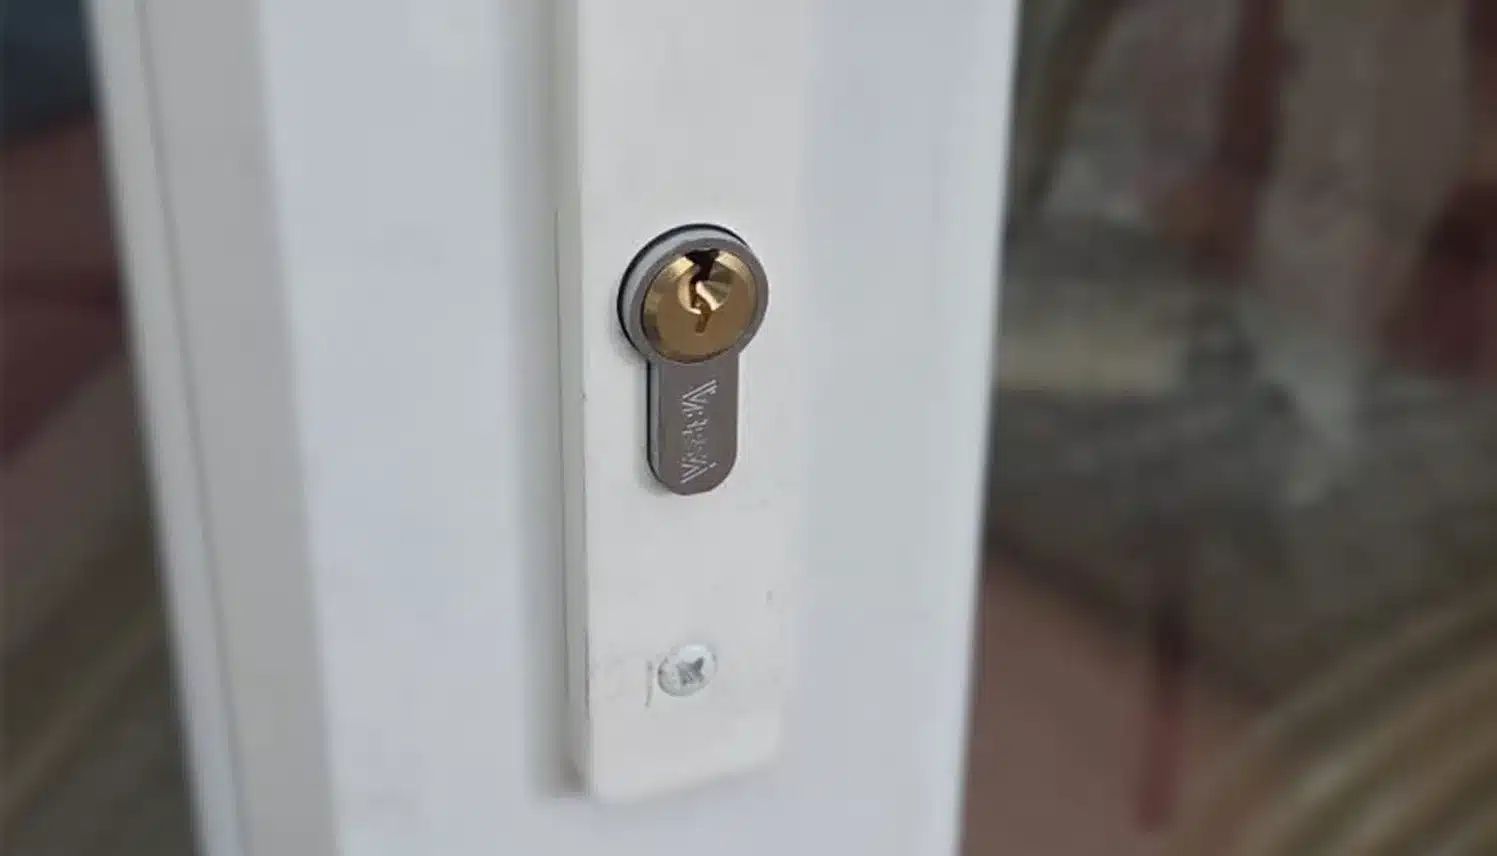
If you’re looking at how to change a lock cylinder, you’re likely dealing with a UPVC door, and the cylinder is the barrel you insert your key into.
Replacing it’s a separate job from replacing the multi-point mechanism behind the door panel.
Identifying which you have first prevents you from diagnosing the wrong component entirely.
Does Your Replacement Lock Need to Meet BS3621?
Before you buy a replacement lock, check whether your home insurance policy requires locks on final exit doors to meet British Standard BS3621.
If it does and your new lock doesn’t carry the kitemark, a claim could be refused.
BS3621 sets minimum security requirements for locks fitted to external doors, and the kitemark is stamped directly onto the lock face, making it straightforward to verify compliance on any lock you’re considering.
Not every lock sold in DIY shops meets this standard, so looking for the kitemark before you buy is a practical step that matters beyond security alone.
What BS3621 Means
Most UK home insurance policies require locks on final exit doors to meet British Standard BS3621, and if yours doesn’t, a claim following a break-in can be refused regardless of how the entry was made.
The standard covers pick resistance, drill resistance, and overall structural integrity. You’ll see compliance confirmed by a kitemark stamped directly onto the lock face.
Not every lock sold in DIY shops carries this, so checking before you buy matters whether you’re researching how to change a lock yourself or weighing up how much to change a lock on a door professionally.
BS3621-compliant cylinders and mortice locks cost more than basic alternatives, but that difference is negligible compared to a refused insurance claim after a burglary.
Checking Your Insurance Policy
Knowing what BS3621 means is one thing; knowing whether your specific policy actually requires it is another, and that second part is where most homeowners fall short.
Before you research how to change a lock barrel or start wondering how much to get a lock change, check your policy documents first.
Look for these four things:
- The words “BS3621” or “British Standard” under lock requirements
- Whether the requirement applies to all final exit doors or just the front door
- Whether non-compliance voids the policy entirely or only affects a claim
- The date your policy renews, since requirements sometimes update at renewal
If your policy requires BS3621, your replacement cylinder must carry the kitemark.
Fitting the wrong lock and assuming it’s fine is a risk that only surfaces when you need to make a claim.
Spotting the Kitemark
There are two places to look for the kitemark on a euro cylinder: the face of the cylinder itself and the packaging it came in. The kitemark is a small crowned symbol accompanied by a standard number. For BS3621 compliance, you’ll see “BS3621” printed alongside it.
When you’re working out how do you change a front door lock correctly, this check matters before you buy, not after. A cylinder sold in a DIY shed might look identical to a compliant one and cost less, but without the kitemark it won’t satisfy most home insurance requirements.
If the replacement cylinder you’re considering doesn’t carry the kitemark on the product itself, treat the packaging claim with scepticism and choose a verified alternative instead.

Door Alignment or Lock Fault: How to Tell
Before assuming a stiff or misfiring lock needs replacing, it’s worth checking whether the door itself is the problem.
We see misaligned doors regularly, particularly on older UPVC frames that have settled over time, and they can make a perfectly functional lock behave as though it’s faulty.
A few straightforward tests will tell you which you’re dealing with.
Reading the Signs
Sometimes what feels like a failing lock is actually a misaligned door, and telling the difference before you buy a replacement cylinder saves both time and money.
Check these signs before replacing anything:
- Stiff key turn only in certain weather — wood swells and UPVC frames shift seasonally, pointing to alignment rather than a cylinder fault
- Handle lifts but bolts don’t fully engage — suggests a gearbox or mechanism issue, not the cylinder
- Visible gap between door edge and frame — the locking points aren’t meeting the keeps cleanly, a door adjustment job
- Key turns freely but door won’t open — the cylinder’s working; the multipoint mechanism likely isn’t
If the cylinder itself is stiff or damaged, that’s your starting point for a replacement.
Testing Door Alignment
Once you’ve narrowed it down to a likely alignment issue, a few straightforward checks will tell you whether the door needs adjusting or the lock genuinely needs replacing.
First, try operating the lock with the door held firmly shut by hand rather than latched. If the mechanism moves smoothly that way but stiffens when the door is under its own weight, the fault is alignment, not the lock.
Next, inspect the striker plate and check whether the bolt or hooks are meeting it cleanly. Scuff marks high or low indicate the door has dropped or shifted.
Finally, run your hand around the frame edge when closed. Any uneven gaps, wider at the top, narrower at the bottom, confirm the frame or hinges need attention before you touch the lock.
How to Measure a Euro Cylinder Correctly
Once you’ve confirmed the fault is in the cylinder rather than the door or gearbox, getting the replacement size right is critical.
Find the central fixing screw on the face of the cylinder, then measure from that screw to each end separately, since cylinders are sized as two figures, such as 35/45, not as an overall length.
A cylinder that’s too long will protrude past the door furniture and become vulnerable to snapping, while one that’s too short may fail to engage the mechanism at all.
Finding the Fixing Screw
Getting the measurement right comes down to two numbers, not one. The euro cylinder has a single fixing screw at its centre point, and you measure from that screw to each end separately, not the total length end to end.
To find the fixing screw:
- Open the door and look at the edge, you’ll see a small screw on the faceplate securing the cylinder in place.
- Remove that screw to release the cylinder.
- Insert the key, turn it slightly to free the cylinder, and slide it out.
- Once removed, locate the central hole through the cylinder body, that’s your measurement reference point.
Both measurements matter because the cylinder may not be equal on each side, and replacing it with an identical split is essential for proper engagement and security.
Measuring Each Side
With the cylinder removed, you need two measurements rather than one: the distance from the centre hole to the outside face of the cylinder (the external side, facing away from the door), and the distance from the centre hole to the internal face (the side facing into the property).
Write both figures down separately. A cylinder described as 35/45 means 35mm on the external side and 45mm on the internal side. These aren’t interchangeable, and ordering a 45/35 by mistake gives you a cylinder that fits physically but sits the wrong way, leaving the longer section exposed outside.
Measure with a steel rule rather than a tape measure if you can.
Even a millimetre or two of error can leave the cylinder protruding enough to create a snapping vulnerability.
Avoiding Common Sizing Mistakes
Sizing mistakes are among the most common reasons a replacement cylinder fails to work properly, and most of them come down to one misunderstanding: measuring the overall length of the cylinder rather than each side independently from the centre.
Getting it wrong creates real problems:
- A cylinder that’s too long on the outside can be gripped or snapped, turning it into a security weakness.
- A cylinder that’s too short won’t engage the multi-point mechanism reliably.
- Assuming both sides match is a frequent error; they often don’t.
- Using total length from a packaging label instead of your own measurements leads to the wrong size every time.
Measure from the centre fixing screw hole to each end separately, note both figures, and buy to those exact dimensions.
How to Change a Euro Cylinder
Once you have your measurements and the correct replacement cylinder to hand, the process breaks down into three straightforward steps: confirming the sizing is right before you commit, removing the old cylinder cleanly, and fitting the new one so it sits flush and engages the mechanism properly.
Getting the measurement confirmed before removal matters because a cylinder that’s wrong by just a few millimetres can leave the lock inoperable or the barrel exposed and vulnerable to snapping.
We’ll walk through each step in order so you can work through the job methodically without doubling back.
Measuring Your Cylinder Correctly
The most common mistake we see with euro cylinder replacements is buying the wrong size, and it comes down to one measurement done incorrectly.
Don’t measure the cylinder’s total length. Instead, measure from the centre fixing screw to each end separately. You’ll end up with two figures, for example 40mm and 45mm, written as 40/45.
Get this wrong and you’ll face real problems:
- A cylinder protruding too far outside becomes vulnerable to snapping or gripping with pliers
- A cylinder sitting too short may not engage the multi-point mechanism properly
- An ill-fitting cylinder can cause the handle or key to feel stiff or unresponsive
- Forcing a wrong-sized cylinder risks damaging the gearbox behind it
Measure twice, buy once.
Removing the Old Cylinder
With your measurements noted and the correct cylinder to hand, you can remove the old one. Open the door and locate the single fixing screw on the door edge, running horizontally into the cylinder. Remove it fully.
Turn the key roughly 10-15 degrees to retract the cam inside the mechanism, then pull the cylinder straight out. If it resists, confirm the key is slightly turned and try again.
| Step | Action | Common Mistake |
|---|---|---|
| 1 | Remove fixing screw | Stripping the screw head |
| 2 | Turn key 10-15 degrees | Forgetting to turn key first |
| 3 | Pull cylinder out | Forcing without key turned |
| 4 | Inspect cam position | Ignoring cam damage |
| 5 | Check mechanism opening | Assuming cylinder was the fault |
Keep the old cylinder until the replacement is confirmed working.
Fitting the New Cylinder
Slide the new cylinder into the lock housing with the cam aligned to the mechanism’s slot, keeping the key turned slightly as you did during removal. Once seated, reinsert the fixing screw without overtightening, just snug enough to hold the cylinder firm.
- Check the cylinder face sits flush with the door face, neither proud nor recessed.
- Test the key turns smoothly before the door is closed.
- Confirm the multi-point mechanism engages fully when you lift the handle.
- Verify the fixing screw hasn’t distorted the cylinder by checking for any stiffness or binding.
If anything feels stiff or the mechanism doesn’t engage cleanly, remove the cylinder and recheck your measurements. A correctly fitted cylinder operates without force.
How to Change a Mortice Lock
Mortice locks sit inside a cavity cut into the door edge itself, making them a more involved job than swapping a euro cylinder but still manageable with the right tools and careful work.
You’ll need a chisel, mallet, screwdrivers, a tape measure, and ideally a mortice chisel for any timber adjustment if the new lock’s faceplate dimensions differ slightly from the old one.
We’ll walk you through removing the old lock cleanly, checking the mortice pocket and faceplate recess, and fitting the replacement so it operates smoothly and sits flush with the door edge.
What Is a Mortice Lock
Older timber doors, particularly those built before the widespread adoption of UPVC and composite, almost always use a mortice lock fitted directly into a cavity cut into the door’s edge.
The lock body sits entirely within the door rather than on its surface.
Key characteristics to understand before attempting any work:
- A five-lever mortice deadlock is the standard for external doors and the minimum required for BS3621 compliance
- The lock is operated by a key alone, with no handle mechanism involved
- Fitting requires a precisely cut mortice pocket, any looseness compromises security
- Replacement means removing and refitting within solid timber, not a simple cylinder swap
This distinction matters because the repair approach, tools required and difficulty level differ markedly from euro cylinder work on UPVC doors.
Tools You Will Need
Once you’ve confirmed you’re dealing with a mortice lock fitted into solid timber, gathering the right tools before you start will save time and reduce the risk of damaging the door during the swap.
You’ll need:
- A flat-head and cross-head screwdriver
- A chisel, ideally bevel-edged, sized to match the existing faceplate recess
- A mallet for seating the chisel cleanly
- A wood drill bit and hand drill or cordless drill
- A tape measure and pencil for marking out
- A try square to keep lines accurate
The chisel is the tool most people underestimate.
A blunt or wrong-sized chisel will tear the timber rather than pare it cleanly, which creates fitting problems and weakens the door edge.
Sharp tools, properly sized, make the job straightforward.
Removing the Old Lock
With the right tools to hand, removing a mortice lock is a straightforward process if you work methodically. Open the door to access both faces, then follow these steps:
- Unscrew the door handles or knobs on both sides and set the spindle aside.
- Remove the keyhole escutcheons; these are usually held by two small screws.
- Locate the faceplate on the door edge and unscrew it; this releases the lock body from the mortice pocket.
- Slide the lock body out of the pocket carefully, keeping it level to avoid catching the bolt mechanism inside.
Once removed, take the old lock to compare measurements before buying a replacement.
The mortice pocket depth and lock body dimensions must match your new lock exactly.
Fitting the New Lock
Fitting the new mortice lock is fundamentally the removal process in reverse, but there are a few checks worth making before the lock body goes back in.
Clean any debris from the mortice pocket, then test the lock body slides in squarely before inserting screws. Use the table below as a pre-fit checklist.
| Check | What to Confirm | Why It Matters |
|---|---|---|
| Mortice pocket depth | Lock body sits flush | Prevents faceplate proud of door edge |
| Spindle alignment | Handle spindle passes cleanly | Avoids binding on operation |
| Keyhole position | Aligns with escutcheon plate | Guarantees smooth key entry |
| BS3621 kitemark | Visible on lock face | Insurance policy compliance |
| Screw thread condition | Threads undamaged | Avoids loose fixing over time |
Once satisfied, insert the lock body, fix the faceplate screws evenly, then refit the furniture.

Mistakes Our Engineers See on DIY Lock Changes
The most common issues we see on DIY cylinder swaps come down to three things: wrong cylinder size, misreading where the fault actually sits, and doors that have settled out of alignment.
A cylinder measured by overall length rather than from the centre screw to each end will often protrude past the face of the door, creating a grip point that makes snapping the lock straightforward from outside.
Add a gearbox fault mistaken for a cylinder fault, or a door that’s dropped on its hinges and no longer sits square in the frame, and a job that looked simple becomes one that costs more to put right than it would have done to get right first time.
Wrong Cylinder Size
One of the most common mistakes our engineers see on DIY cylinder replacements is getting the measurements wrong. The cylinder must be measured from the centre fixing screw to each end separately, not as an overall length.
Getting this wrong causes real problems:
- Too long on the outside: the cylinder protrudes beyond the door face, making it vulnerable to snapping or gripping with pliers.
- Too short: the cylinder fails to engage the multi-point mechanism correctly.
- Wrong overall length assumed: buying a replacement based on total length rather than split measurements.
- No anti-snap specification: fitting a standard cylinder where an anti-snap rated one is needed, leaving the door vulnerable.
Measure both sides individually before ordering anything. A few millimetres out and the replacement either won’t work or creates a security weakness.
Misreading the Mechanism
Another fault our engineers regularly come across is a homeowner swapping out the euro cylinder only to find the door still won’t lock or release properly, because the real problem was never the cylinder to begin with.
On multi-point UPVC doors, the gearbox sits inside the door slab and drives all the hooks, bolts and rollers when you lift the handle. When that gearbox wears or fails, no cylinder will fix it.
The symptoms can feel identical: a stiff mechanism, a handle that won’t return, a door that won’t secure. Before replacing any cylinder, test whether the handle operates the mechanism smoothly with the door open.
If it doesn’t, you’re looking at a gearbox replacement, which is a more involved job and not straightforward DIY territory.
When Doors Settle
Settling is something UPVC doors do over time, particularly as frames bed into brickwork or as seasonal temperature changes cause slight movement in the surrounding structure. The result is misalignment between the door slab and frame, which puts stress on the locking mechanism and can make an otherwise functional lock feel stiff or unresponsive.
Before assuming the cylinder or gearbox has failed, check these indicators:
- The door drags or catches when opening or closing
- Visible gaps appear unevenly around the door edges
- The handle requires extra force to fully engage the multipoint mechanism
- The locking points don’t align cleanly with their keeps in the frame
Hinge adjustment resolves most settling issues. Replacing the lock first is a common and unnecessary expense our engineers regularly see.
Signs the Job Needs a Locksmith, Not a DIY Fix
One fault our engineers regularly encounter is a multi-point mechanism that has failed internally, a problem no cylinder swap will fix.
The gearbox inside a UPVC door drives the hooks, rollers or bolts into the frame, and when it wears out or breaks, the door either won’t lock or won’t open regardless of which cylinder is fitted.
If your key turns freely but nothing engages, or the handle lifts without resistance and nothing moves, the mechanism itself is the problem and the repair goes well beyond changing a cylinder.
When the Mechanism Fails
Sometimes what feels like a faulty cylinder is actually a failing gearbox, and swapping the cylinder won’t fix it. Multi-point mechanisms wear internally, and the symptoms can mimic a cylinder problem.
If you’re experiencing any of the following, the mechanism itself is likely the issue:
- The handle lifts but the door won’t fully lock, even with a new cylinder fitted
- Hooks, bolts or rollers fail to extend fully around the frame when you lift the handle
- The mechanism feels gritty, stiff or inconsistent regardless of which key or cylinder you use
- The door locks from outside with the key but not from inside using the handle
Mechanism replacement is a more involved job than a cylinder swap, and getting it wrong can leave the door insecure. It’s worth calling us.
Beyond the Cylinder
A euro cylinder swap covers a lot of ground, but there are situations where it won’t solve the problem and attempting it anyway can leave the door less secure than when you started.
If the fault is in the multi-point gearbox, swapping the cylinder changes nothing. If the door has dropped and the mechanism no longer aligns with the keep, the lock will continue to feel stiff or fail to engage regardless of which cylinder you fit.
Other situations worth handing over: mortice locks in solid timber, anything where BS3621 compliance affects your insurance, and any job where forced entry damage has compromised the frame itself.
Ricky and the team cover Burntwood and the surrounding area, 24/7, and can assess whether you need a cylinder, a mechanism, or something else entirely before any work begins.
Final Thoughts
Changing a front door lock is straightforward when you’ve correctly identified your lock type, taken accurate measurements, and followed the right removal and fitting sequence. We’ve walked you through Euro cylinders, mortice locks, common DIY mistakes, and when to call a professional. Before you consider the job complete, test the lock repeatedly with the door open, then closed, and verify it meets BS3621 if required by your insurer.